
Quality Built® Tech Alert
November 12th, 2015
Volume 2, Issue 13
Flashing Panels For Exterior Wall Penetrations
By: Frank Yellico, P.E. & Jeff Hoch,
Quality Built Technical Services Department
Innovations in building products and homebuilding construction techniques have substantially evolved over the past decade. A particular area in which significant advancements have been made is in the construction of a superior building envelope system. The industry has concentrated on improving details and techniques for the installation of roofing, decking, weather barriers, windows, and doors among other components; however, an area that is critical yet often overlooked is flashing around smaller penetrations through exterior walls such as hose bibbs, gas piping, electrical boxes, vents, conduits, A/C sets, and low-voltage wiring. An average home will have ten to twenty of these exterior penetrations.
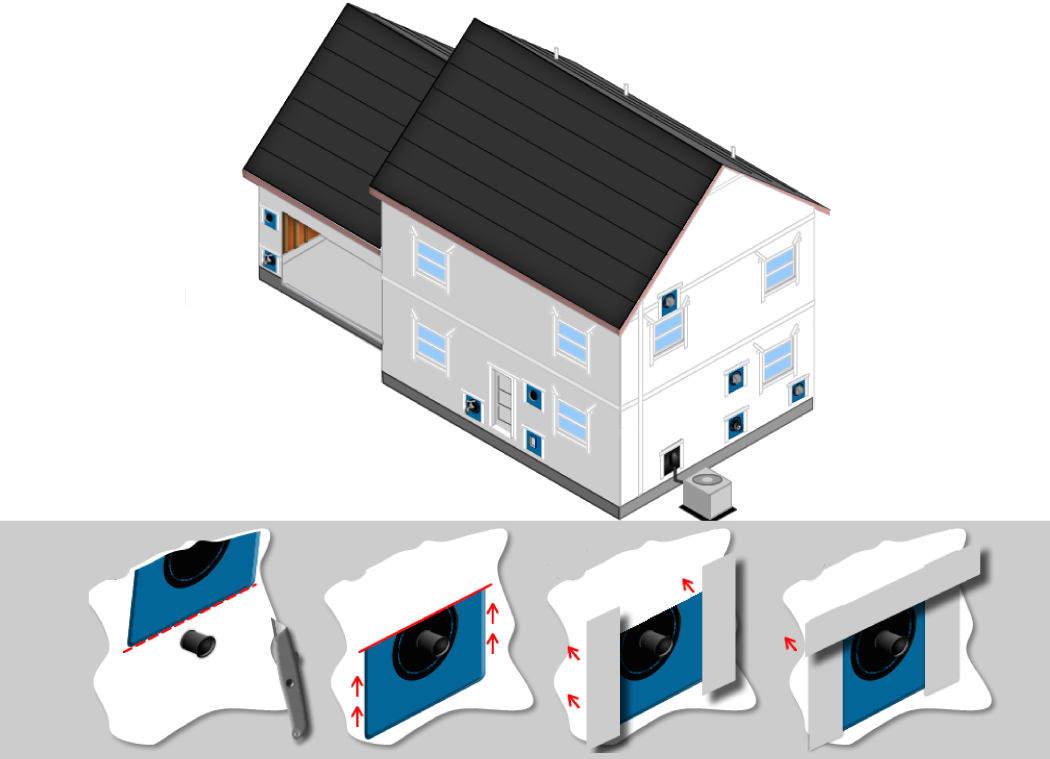
Eliminating the annular space around these exterior penetrations can stop moisture migration, improve energy efficiency by reducing air infiltration, reduce insect infestation, and help achieve a superior building envelope. There are several polyethylene/rubber flashing panels available which provide an effective method to flash these exterior wall penetrations with a no caulk, weatherproof seal. Flashing panels will work on all types of exterior cladding systems and all penetrations. They are especially important on thinner cladding systems such as one-coat stucco systems where a flashing panel is mandatory.
Proper installation procedures must be followed to assure the effectiveness of the flashing panel. Adequate backing must be installed to allow proper attachment of the panel to the structure. Flashing panels are available for various types of wall penetrations and by different manufacturers. This discussion focuses primarily on the recommendations of the manufacturer of the Quickflash® flashing panels.
There are three types of weather-resistive barrier (WRB) that are addressed in the manufacturer’s installation instructions. First, there is the traditional “black paper,” i.e., 60-Minute, Grade D building paper, such as those manufactured by Fortifiber® and Davis Wire, among others. The second type is the housewrap such as those manufactured by DuPont®, TYPAR, CertainTeed, Dow®, and others. Lastly there are factory-applied, liquid-applied membranes such as ZIP System® panels. The installation methods for the flashings vary based on the type of WRB being used.
BLACK PAPER
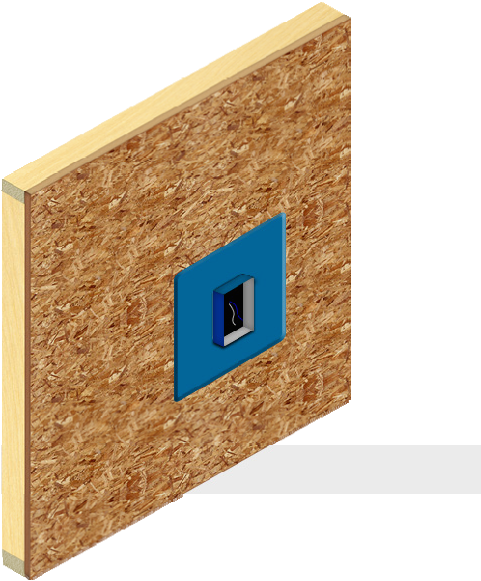 For installation on modules using black paper, the flashing panel must be installed prior to the installation of the WRB. This is important so the flashing can be nailed to the structure and proper lapping of the WRB can be achieved. Note that the Quickflash installation guide indicates four fasteners per flashing panel -- two fasteners midway up the vertical sides and two more near the top -- when installation uses black paper WRB. Sheathing, blocking, or other solid backing is required all the way around the flashing panel to allow for this fastening and support of the WRB.
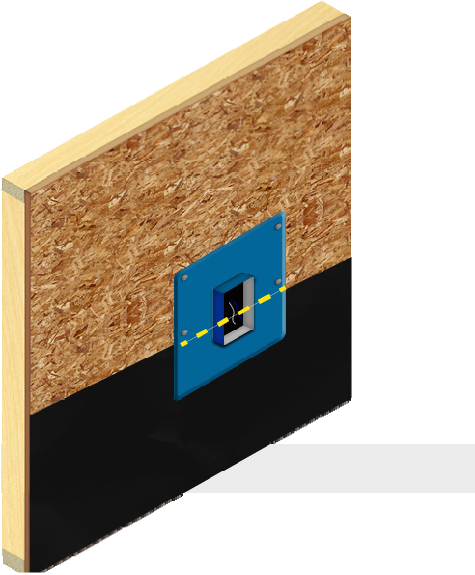
The lower course of WRB should be bibbed beneath the flashing panel in a weatherboard manner.
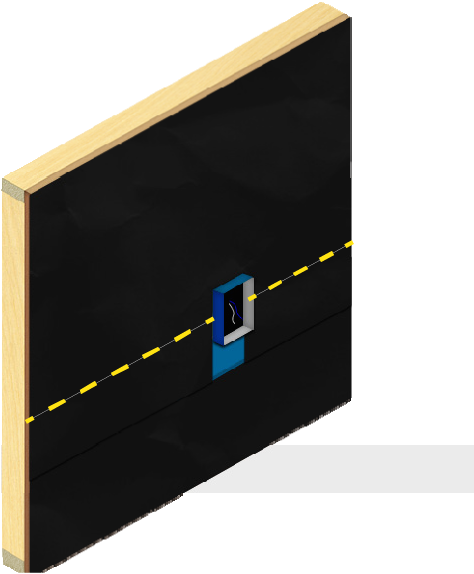
The next course of paper should overlap the lower course of paper and the flashing panel. It should be notched to expose the penetration as well as the lower edge of the flashing panel. Lathers often cut the paper to only expose the box or pipe. While this does not interfere with the performance of the device it does not give access to verify the lower course of paper is indeed properly lapped behind the flashing panel.
Graphics are property of Quickflash® Weatherproofing Products, Inc. and were used with permission.
HOUSEWRAP
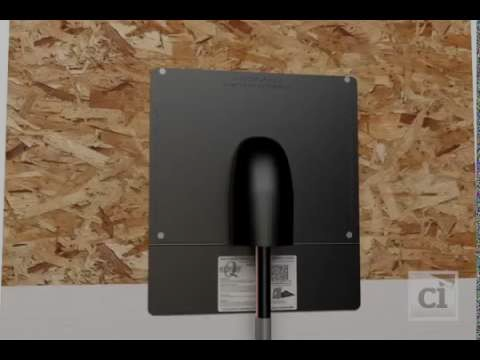
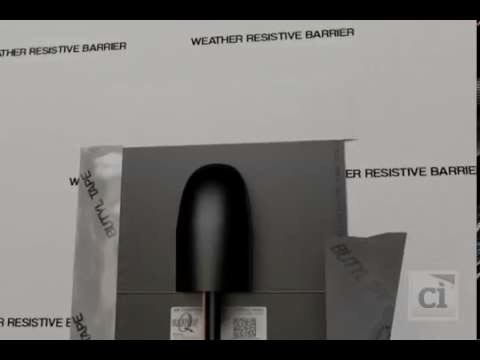
Instructional installation videos for various types of wall penetrations using housewrap (WRB) are provided below. Note that additional types of flashing panels other than those presented here are available. When using housewrap, the flashing panels can be installed before or after the WRB is installed, as shown in the demonstration videos which follow.
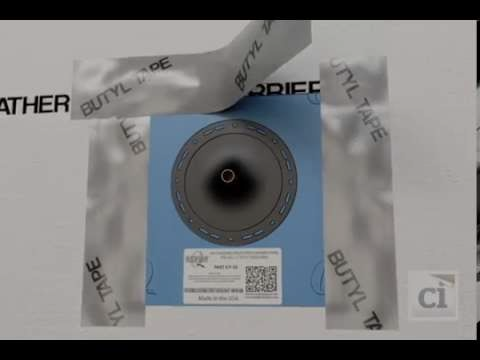
Quickflash® Installation Guide for Plumbing Panels BEFORE Weather Resistant Barrier**
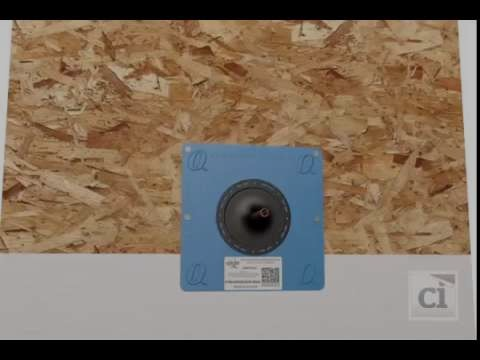
Quickflash® Installation Guide for Plumbing Panels AFTER Weather Resistant Barrier**
 Quickflash® Installation Guide for Electrical Panels BEFORE Weather Resistant Barrier**
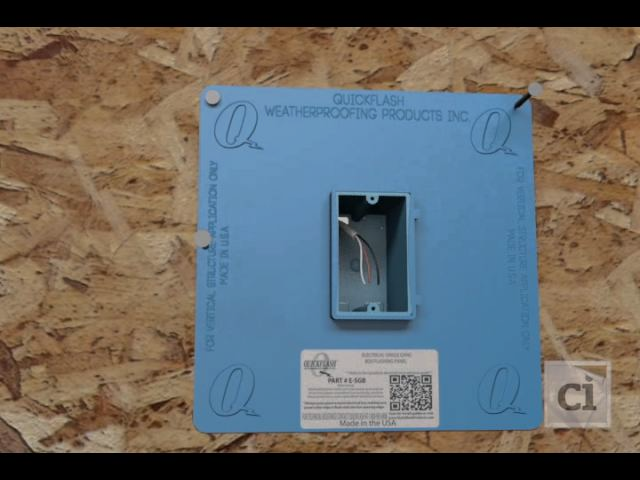
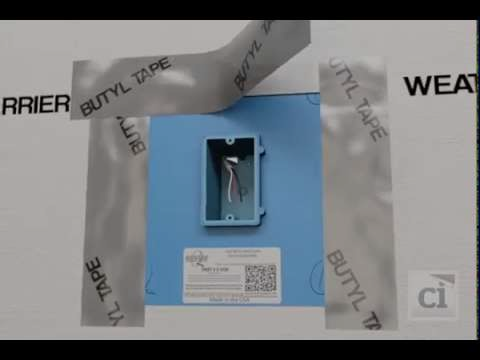
Quickflash® Installation Guide for Electrical Panels AFTER Weather Resistant Barrier**
Quickflash® Installation Guide for A/C Panels BEFORE Weather Resistant Barrier**
Quickflash® Installation Guide for A/C Panels AFTER Weather Resistant Barrier**
FACTORY-APPLIED LIQUID-APPLIED MEMBRANES
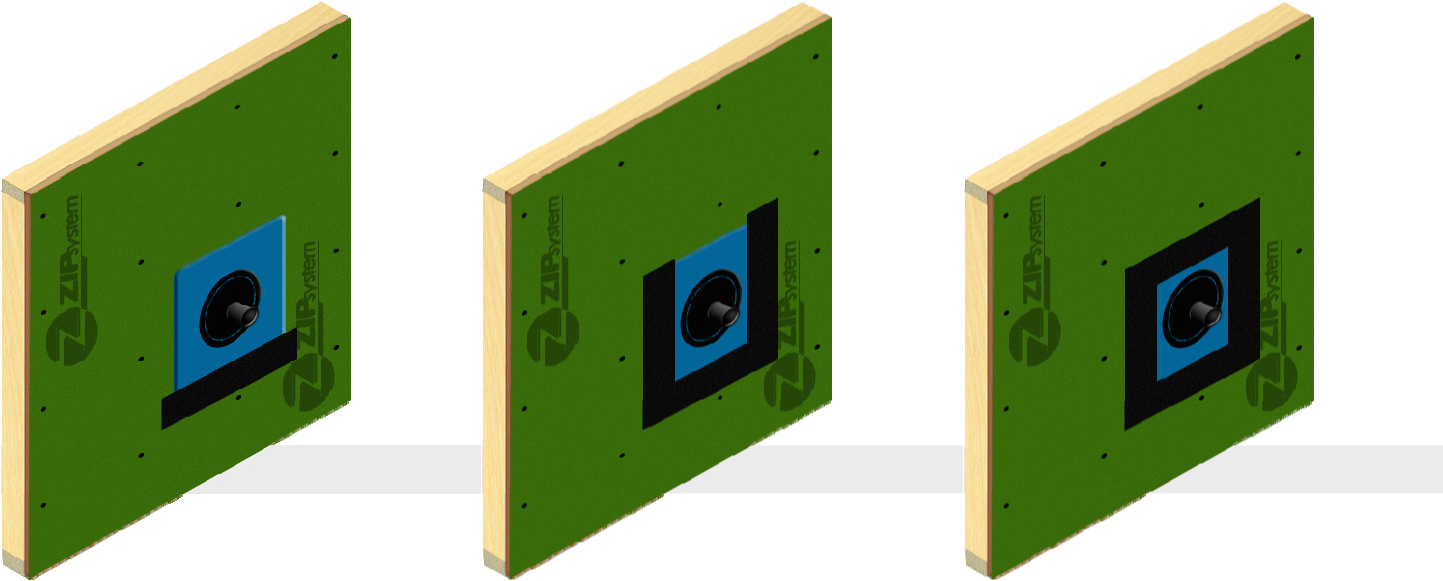
For these weather-resistive barriers, the flashing panels will by necessity be installed after the WRB. The flashing panel is centered on the penetration, then sealed to the WRB using an approved compatible flashing tape. The tape is installed at the sill of the flashing first, then the jambs, and finally across the head of the flashing panel. The flashing tape must be rolled with a J-roller or other similar roller to activate the pressure-sensitive tape.
For both the housewrap installation and the factory-applied, liquid-applied membrane installations, particular attention must be paid to the sealing of the tape/flashings, especially the horizontal tapes. These applications create a reverse lap that if not properly sealed can result in leakage and damage to building components.
IMPROPER FLASHING PANEL INSTALLATIONS
 For these weather-resistive barriers, the flashing panels will by necessity be installed after the WRB. The flashing panel is centered on the penetration, then sealed to the WRB using an approved compatible flashing tape. The tape is installed at the sill of the flashing first, then the jambs, and finally across the head of the flashing panel. The flashing tape must be rolled with a J-roller or other similar roller to activate the pressure-sensitive tape.
 While this flashing panel is properly integrated into the WRB, it is not supported and fastened per the manufacturer’s installation guidelines.
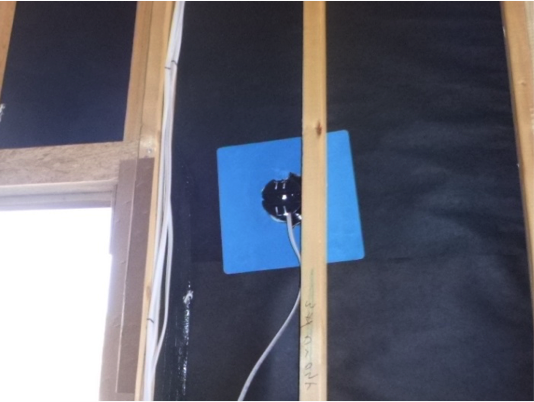 This flashing panel is improperly installed with no paper bibbed behind the lower edge in a weatherboard fashion. If water travels to the flashing panel it will drain to the inside of the wall cavity causing damage to the building materials.
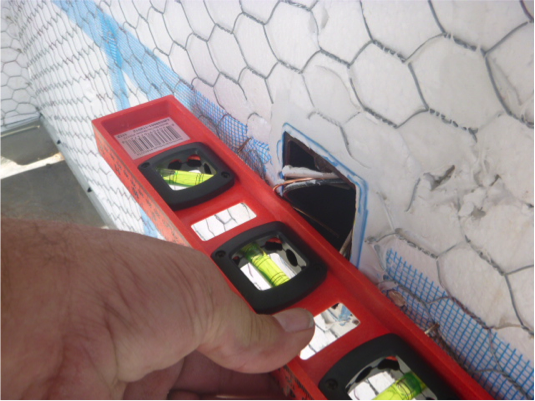
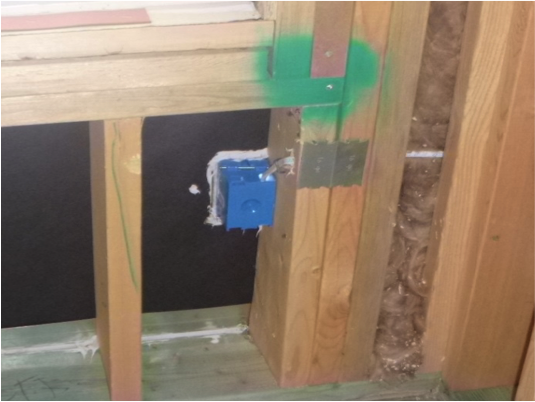 This photo shows a penetration where the flashing panel was either not installed or was improperly installed. The sealant applied around the box is only applied at the three accessible sides leaving the fourth side unsealed and susceptible to water intrusion.
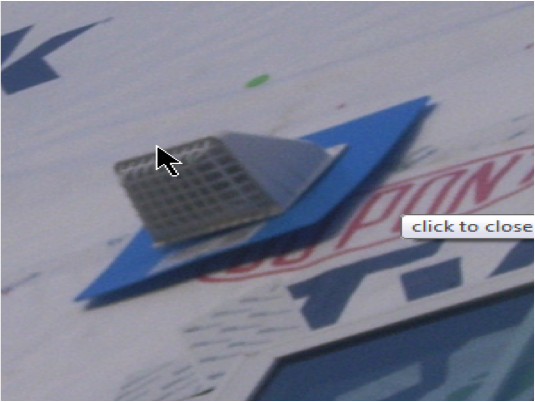
 This application is unusual; however, the flashing panels are properly integrated with, and sealed to, the WRB.
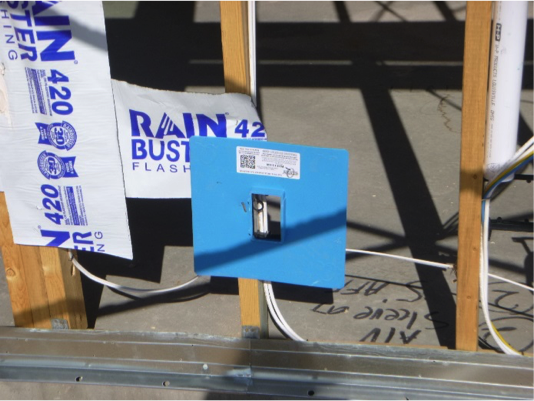
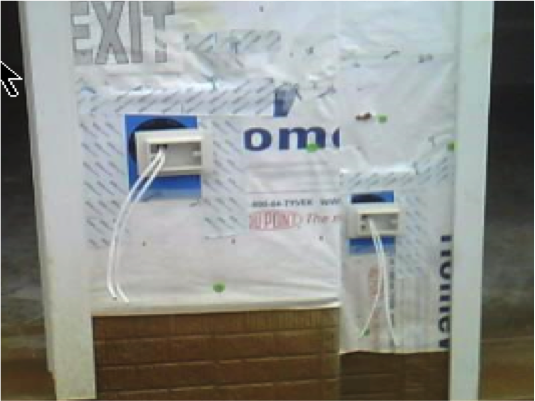
 This flashing panel was installed after the housewrap WRB, but not properly integrated or taped to the WRB.
 This flashing panel was installed before the housewrap WRB, creating a reverse lap at the bottom of the flashing.
 Additionally, when used in a stucco application to work effectively, the face of the flashing panel should be flush with the face of the finish coat. If the face is not flush the gasket from the cover plate may not make full contact, therefore not properly sealing to the flashing panel.
ITEM OF NOTE
A common fallacy is that spray foam applied by the insulation contractor on the interior of the home will properly seal the exterior wall penetrations. Spray foaming the annular space around the exterior wall penetration is important; however, this will not properly seal the exterior of the home. Sheathing and weather barrier gaps will still exist if the interior spray foaming of exterior wall penetrations is the only treatment provided. Water intrusion, insect infestation, air infiltration, and liability issues will still exist if flashing panels are not properly installed on the exterior of the home.
QUALITY BUILT RECOMMENDATIONS
A Technical Plan Review™ performed on your design documents using published best building practices will identify details which are weak and/or in conflict with codes or manufacturer’s specifications. Flashing panel installation details should be included in the plans to assure proper usage and installation. Checkpoints should be included in construction inspection templates to ensure proper usage and installation of flashing boots are being made on all homes.
Please note that IBC Chapter 14 and IRC Chapter 7 mandate thorough weather-resistive systems. Note that there are at least two major manufacturers of flashing panels for exterior wall penetrations. These manufacturers can be provided at your request. Requiring trade contractors to supply and install flashing panels on their wall penetrations is recommended. Each trade contractor should be held responsible for the proper flashing of any wall penetration they create in the execution of their work.
Water intrusion issues that can occur as a result of exterior wall penetrations include degradation of building components, visible water on the interior of a home, mold, and staining of building components. Water intrusion into a home can result in significant issues for the builder and the homeowner. Minimizing all water intrusion areas can result in increased value, a higher level of sustainability and reduced risk. A home that has a superior weather barrier system can last substantially longer.
For additional information see the install guides and videos on the Quickflash® Weatherproofing Products, Inc. website http://www.quickflashproducts.com
Photographs contained are from actual site inspections performed by Quality Built® Risk Assessment Specialists. **Graphics and Videos are property of Quickflash® Weatherproofing Products, Inc. and were used with permission.
ABOUT THE AUTHORS
 Frank Yellico, P.E. is a Forensic Engineer, Field Consultant and Technical Services Technician at Quality Built.
Frank is a registered civil engineer with over 20 years’ experience in the residential land development and homebuilding. He has also performed municipal engineering work including design and construction inspection management of water and sewer utilities and roadways. Frank establishes a rapport with his clients and is successful in completing assigned engineering projects on time and on budget. He operated a profitable residential building corporation for over 15 years and received over 20 awards for excellence in building and marketing.
You can reach Frank at: [email protected]
 Jeff Hoch is a Forensic Architect, Field Consultant and Technical Services Technician at Quality Built.
Jeff has been a Licensed Architect for over 18 years. Jeff has worked as a forensic plans examiner and inspector for 18 of the past 25 years, as well as performing construction quality assurance inspections for over 10 years. He has performed thousands of inspections, while providing plans review, forensic inspections, and testing in many states. Jeff has an in-depth knowledge of Building Codes, Design Standards, Local Ordinances, Forensic Building Failure Analysis, and Construction Defects.
You can reach Jeff at: [email protected]
Quality Built's Commitment
Quality Built is committed to being a visionary leader in the insurance, financial and construction industry by providing reliable and innovative Third Party Quality Assurance Services to our clients and by providing those services in the most professional and efficient manner utilizing cutting-edge technology, proprietary software and employees who maintain the highest level of integrity and expertise.
Contact Quality Built today at 800-547-5125 or email: [email protected]