
THE EVER-EVOLVING BUILDING ENVELOPE: Part 2: Air Barrier Fundamentals
Part 2: Air Barrier Fundamentals
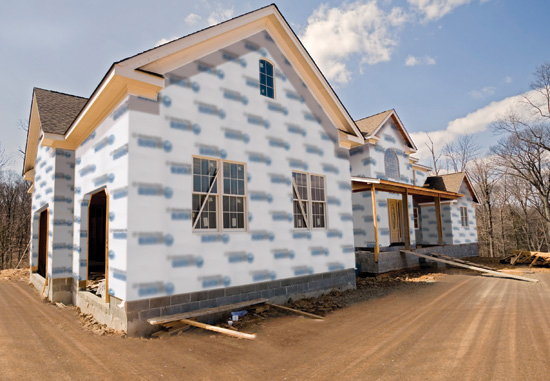
Primarily, an air barrier is designed to stop or significantly reduce air movement through the building envelope. Some air barriers act as weather-resistant barriers (WRB), while some stop liquid water from coming into direct contact with building materials. To determine if the air barrier is also the WRB, you will need to refer to the architectural plans, details, and specifications since in the field, there will be no clear indication from simply looking at the air barrier. Sometimes, the air barrier is covered by a second layer of material that may be serving as the WRB, or may simply be a redundant layer or serving as a bond break. For more discussion related to these concepts, see the other articles in our Tech Alert series: The Ever Evolving Building Envelope - Part 1 Window Flashing Installation and Part 3 Tyvek 2-Layer Installations.
To describe how an air barrier works effectively, we will first compare it to a windbreaker through the following example: Think of the last time you were outside on a cold and windy day, with a garment such as a loosely woven sweater.
Can you remember how the wind would blow through it and make you feel cold? This would be equivalent to the traditional black paper WRB with lots of seams and laps that air flows through.
Now, can you remember being in similar condition, with a windbreaker that did not fit tightly at the cuffs, neck line, and waist? If so, you may recall it was better than the sweater, but there was still leakage at the cuffs, neck line, and waist where the breeze could still penetrate. This example would be equivalent to an air barrier that is not completely sealed or continuous.
To explain, a sustainable windbreaker has elastic cuffs and cinches at the neck and waist to completely block incoming air and prevent cold air from entering inside. This is like a complete and continuous air barrier that prevents air movement through the channels of the building envelope.
For an air barrier to work effectively, it takes more than just tacking it up on the wall. It is just like our windbreaker example above. For positive measures, we need to start tightening up all of the loose areas and seal up all the holes.
A home without an air barrier can, in the worst case scenario, be considered drafty. If you place your hand near a wall outlet or light fixture box on a windy day, or when there is a fair amount of temperature variation between the exterior and interior of your home, and you happen to feel air blowing, your house does not have a properly installed air barrier. More surprisingly, you may be shocked by how much air is leaking in or out of your home. If you add all the small gaps around outlets, light fixtures, plumbing penetrations, cable outlets, windows, doors, and sill plates, you may have significant potential for air leakage in your home. See our upcoming Tech Alert on Air Leakage Testing.
The gaps and channels of air infiltrating throughout an average home can be equivalent to a 6 to 12 inch hole in your wall. The picture to the left shows a smoke pen being used to illustrate the air movement through an outlet. Picture this air movement in the dead of winter or on a scorching hot and humid summer day and imagine all of the energy your home lost through just this one outlet.
Understanding the amount of air leakage that can occur and its potential impact will give you a greater appreciation of why aggressive attention to detail needs to be taken when installing an air barrier.
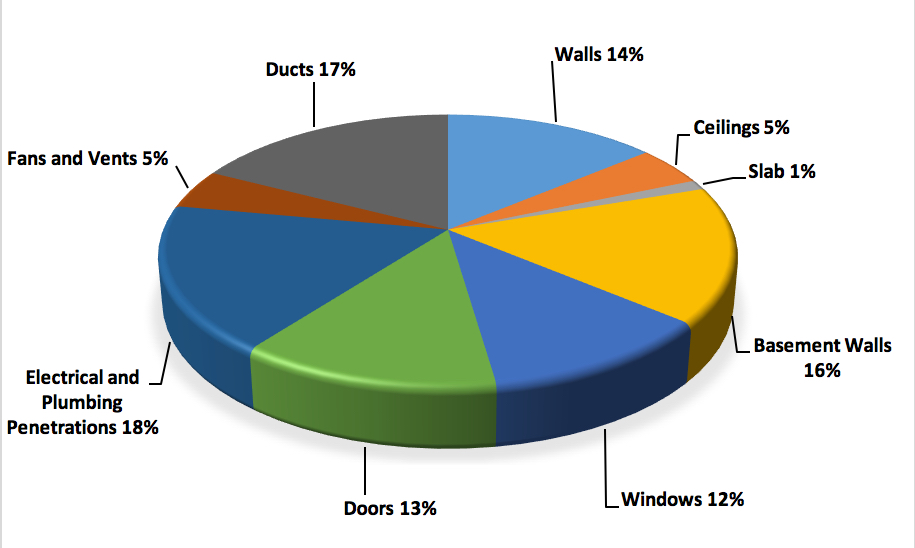
Denoted in the graph above, notice the percentage of leakage at Electrical and Plumbing Penetrations. The seemingly small penetration of one plumbing pipe or a hose bibb can equate to a serious volume of air leakage if not sealed correctly.
In addition, every seam of housewrap needs to be sealed at both the top and bottom of wall terminations. Exterior penetrations, including: electrical outlets, hose bibbs, light fixtures, and windows need to be sealed tight.
Because of our increasing awareness of its counterproductive characteristics, both to energy efficiency as well as moisture migration, air infiltration is quickly becoming an area of great importance and often, one of builder’s larger enemies.
While for decades, air barriers have been used in colder climates, their use is increasing across the country with the spotlight on energy accountability, as well as energy loss. Codes are ramping up along with local jurisdictions, enforcing greater energy efficiency and performance requirements from builders.
Air Barriers can also have a positive effect on the indoor air quality of a home and the long term durability of the structure. The air that moves through the structure carries water in the vapor form with it as it moves. So whether you can see it or not, there is moisture in the air and sometimes there is excess moisture in a home’s interior and walls. Moisture in the form of a vapor is much smaller in size (on a molecular level) as compared to liquid water, and while an air barrier may not allow water to pass through its membrane, many will allow the much smaller moisture vapor to escape. An effective air barrier allows the home to breathe or exhale this moisture that is in the form of an invisible vapor. For greater details related to how a breathable/ vapor permeable air barrier works, see our upcoming Tech-Alert on Breathable Air Barriers.
An air barrier system offers one of the most cost effective applications for a builder to use to offset energy requirements. However, if we ignore the finer details during its installation process and leave penetrations and seams open and unsealed, we miss one of the greater opportunities for creating an energy efficient home. Quality Built, LLC offers and recommends third party QA inspections of air barrier installations, including air infiltration testing at a random sampling of units, homes, and buildings to verify that the air barrier has been installed correctly. This inspection should occur following the installation of the air barrier, but before it is covered by other systems for installation, where the air barrier is separate from the WRB or is installed first as part of a multi-layer WRB. In detail, this may mean multiple inspections of the building envelope are necessary. See our third and final part of this series, as we will provide more detailed information on the installation of stucco over DuPoint™ Tyvek® Homewrap®.